Network Boot with pfSense and Tftpd32
This is a repost from my wordpress blog and meant as a note to self for future use.
A quick setup guide on how to create the basic setup for a PXE network boot environment using pfSense firewall and Windows Server.
DHCP Server - pfSense Configuration
DHCP configuration page is found at:
Services => DHCP server (http://192.168.1.1/services_dhcp.php)
| TFTP server | Enter IP of TFTP server |
| Enable Network Booting | Enter IP of TFTP server as next-server and 'lpxelinux.0' as filename. Root-path-string is left empty. |
TFTP Server - Tftpd32
Tftpd32 is a straight forward TFTP server. Can be downloaded from http://www.jounin.net/tftp-server-for-windows.html
Be sure to disable the Tftpd32 DHCP Server to prevent issues on the local network and set PXE compatibility and a proper directory in the TFTP server options.
Configure your firewall properly and test the TFTP server with a client. Create a dummy file and put it to and get it back from the TFTP server.
waagbo@laptop01:~$ echo "test" > testfile
waagbo@laptop01:~$ tftp 192.168.1.237

tftp> put testfile
Sent 6 bytes in 0.0 seconds
tftp> get testfile
Received 6 bytes in 0.0 seconds
tftp>
PXE Environment - Pxelinux
Pxelinux is a part of Syslinux and can be found at https://www.kernel.org/pub/linux/utils/boot/syslinux/. It’s recommended to use the latest release (6.03-pre18 in the time of writing). There are multiple variations of the pxelinux.0 binaries. For more information about pxelinux variations, check out the official wiki at http://www.syslinux.org/wiki/index.php/PXELINUX.
Extract the archive to a temporary location and recreate the following directory structure inside your TFTP server. The binaries are located in the bios directory and can be found by searching for them.
pxelinux.cfg/default
ldlinux.c32
libcom32.c32
libutil.c32
lpxelinux.0
memdisk
menu.c32
vesamenu.c32
The content of pxelinux.cfg/default is the default boot menu. Here is an example configuration:
UI menu.c32
PROMPT 0
TIMEOUT 300
ONTIMEOUT local

MENU TITLE PXE Menu

LABEL Memtest86
	MENU LABEL Memtest86+
	kernel images/memtest86
Memtest86+ can be downloaded from http://www.memtest.org/#downiso. Be sure to fetch the Pre-Compiled Bootable Binary. Note that memtest86+-5.01.bin has to be renamed in order for the binary to work. Remove any special characters and the .bin extension. In this case it is renamed to memtest86 and placed in the images subfolder.
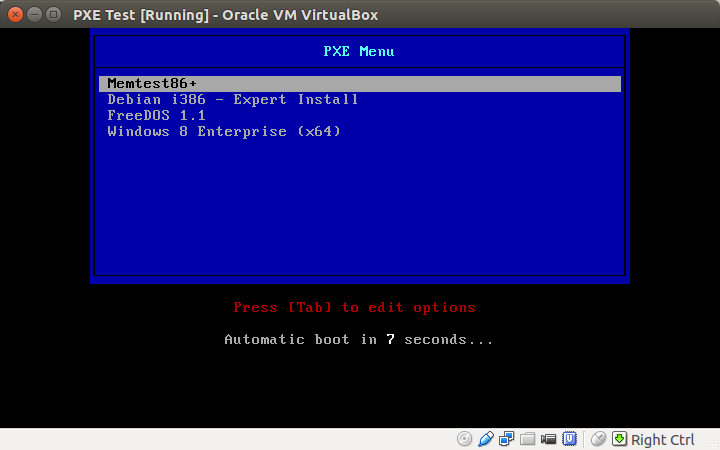
Testing with VirtualBox
Create a new Virtual Machine in VirtualBox. Be sure to use the latest version of the Oracle VM VirtualBox Extension Pack. If you have trouble with VirtualBox crashing, try changing the network adapter to Intel PRO/1000MT Server (82545EM).
The next step
The next step will be to provide more boot options and configurations. PXE has support for MAC and IP address specific configurations (create another file in the pxelinux.cfg directory). Suggested options are the OpenELEC media center and various Windows installation media.